Picture this: you flip the switch, steam curls around you, and the water hits just the right temperature—your brand‑new shower feels like a private retreat, not a chore.
Most Kingman homeowners assume a custom shower means endless decisions, surprise costs, and a schedule that never ends. The truth is, with a clear roadmap, you can dodge the guesswork and keep the project moving on your terms.
We’ve broken the process down into bite‑size steps, from picking the perfect tile to wiring the lights that set the mood. Each phase is designed to give you confidence, control, and a bathroom that actually makes you smile.
Curious how the pieces snap together and what you need to ask your contractor? Keep reading and you’ll see exactly what to expect at every turn.

Assessing Your Space & Setting a Realistic Budget
Measure Twice, Cut Once
Start by pulling out a tape measure, a notepad, and a level. Walk the bathroom, jot down the width, depth, and ceiling height of the shower zone, then sketch a quick rectangle on paper.
Don’t forget the hidden obstacles: door swing, existing plumbing, and any low‑lying vents. A simple floor‑to‑ceiling diagram saves you from nasty surprises when the contractor shows up.
- Floor length: from wall to wall
- Wall height: include any crown molding
- Clearance: at least 30‑inches of walking space
Budget Blueprint
Next, give your wallet a reality check. Break the project into three buckets: materials, labor, and contingency. Materials cover tile, shower pan, and glass; labor includes plumbing, electrical, and finish work.
Set a hard cap for each bucket, then add a 10‑15% buffer for the unexpected—think water‑damage repairs or a last‑minute fixture upgrade.
- Materials: 40‑50% of total
- Labor: 30‑35% of total
- Contingency: 10‑15% of total
Choosing the Right Shower Style & Materials for Kingman Climate
Kingman’s desert heat and occasional monsoon bursts demand a shower that can handle both extremes. Pick a style that lets you stay cool in summer and warm in winter without fighting the elements.
Heat‑Resistant Tiles & Surfaces
Natural stone, porcelain, and high‑gloss ceramic stay cool to the touch, even when the sun beats down on your home. *Avoid* dark, heat‑absorbing tiles that turn your shower into a sauna.
- Porcelain: dense, low‑porosity, perfect for dry climates.
- Slate: adds a rugged look and stays cool.
- Large‑format tiles: fewer grout lines, less maintenance.
Water‑Smart Materials
Monsoon rain can bring mineral deposits. Choose surfaces that won’t stain or crack when water chemistry shifts.
- Quartz‑based shower walls: non‑porous, easy to wipe clean.
- Stainless‑steel panels: industrial vibe, rust‑free.
- Glass with anti‑scale coating: sleek, low‑maintenance.
When you match the style to Kingman’s climate, you get a shower that looks good and works hard, day after day.

Designing the Layout: Plumbing, Drainage, and Accessibility
Plumbing Basics
First thing’s first: locate the existing water lines. In most Kingman homes they run behind the wall studs, so you’ll likely be working within the same chase to keep the job cheap and quick.
Map out where the hot and cold supply will meet the shower valve. Keep the valve at least 6 inches above the floor to avoid splashing the pipe joints and to make future maintenance a breeze.
- Use PEX tubing for flexibility and resistance to the desert heat.
- Install a pressure‑balancing valve to keep the temperature steady, even when someone flushes a toilet.
- Plan a shut‑off valve right at the shower for easy repairs.
Drainage Considerations
Good drainage is the difference between a spa‑like retreat and a soggy mess. Kingman’s hard‑water can leave mineral buildup, so a larger drain helps keep things moving.
Choose a 2‑inch drain line and slope the floor at a minimum of 1/4 inch per foot toward it. That tiny angle does the heavy lifting.
- Install a linear drain for a sleek look and faster water evacuation.
- Seal all connections with waterproof tape—no shortcuts.
- Consider a trap primer to keep the trap from drying out when the shower isn’t used often.
Accessibility Tips
Think about who will be using the shower. A curbless entry not only looks modern, it makes the space safer for kids and grandparents.
Leave at least 36 inches of clear floor space inside the shower. That’s the sweet spot for a wheelchair turn radius. Add grab bars that blend with the tile, and position the controls within easy reach.
- Low‑profile shower seats can be built into the niche.
- Non‑slip tiles or a textured floor finish keep footing solid.
- LED step lights guide the way after a night‑time shower.
Selecting Fixtures, Lighting, and Smart Controls
Fixtures that Fit the Kingman Climate
Metal finishes that rust in humidity are a no‑go. Choose stainless steel, brushed nickel, or powder‑coated brass to survive the desert heat and occasional monsoon bursts.
Key choices include:
- Thermostatic valves – keep water at the perfect temperature without constant tweaking.
- Low‑flow showerheads – save water while delivering a strong, satisfying spray.
- Handheld units – great for kids and for cleaning the tub.
Lighting for Mood and Safety
Good lighting does two jobs: it makes the space feel larger and it prevents slips. Layer your light sources for the best effect.
Mix and match:
- Ambient LED strips hidden behind a recessed niche – soft glow, no glare.
- Task lights over the bench – bright enough for shaving, gentle enough for a night‑time rinse.
- Accent LEDs highlighting tile patterns – adds a spa‑like vibe.
Make sure all fixtures have an IP rating of at least 44 for wet‑area safety.
Smart Controls: Convenience Meets Efficiency
Today’s showers can remember your favorite temperature, start before you step in, and even track water usage. A smart controller is the bridge between luxury and practicality.
Look for features like:
- Wi‑Fi or Bluetooth connectivity – control from your phone or voice assistant.
- Pre‑set programs – “Morning Rush” for a quick blast, “Evening Spa” for a long soak.
- Leak detection alerts – peace of mind when you’re away.
Integrate the controller with your home’s automation hub for a seamless experience.
Hiring & Coordinating with a Licensed Contractor
Check the Credentials
First thing’s first: ask for a copy of the contractor’s Arizona license and proof of insurance. Without those, you’re gambling with your home. A quick call to the state licensing board can confirm everything is current.
Next, demand at least three recent references from Kingman clients. Listen for details about timeliness, cleanup, and how the crew handled unexpected hiccups.
- License number and expiration date
- General liability & workers’ comp coverage
- References with phone numbers
Set Clear Terms
Before any hammer swings, lock in a written contract that spells out scope, materials, and a realistic timeline. Flat‑rate pricing beats vague “hourly” estimates. Include a payment schedule tied to milestones—deposit, rough‑in, finish, final walk‑through.
Don’t forget a clause for change orders. It should state how extra work is approved and priced, so you never get blindsided by a surprise invoice.
- Scope of work, itemized
- Milestone‑based payments
- Change‑order procedure
Stay in the Loop
Good communication is the secret sauce. Ask the contractor to give you a weekly update—either a quick email or a short on‑site walk‑through. Seeing progress in person keeps the project on track and lets you catch issues early.
Designate one point person—either you or a trusted family member—to field questions and approve decisions. That way the crew isn’t left guessing, and you avoid costly delays.
- Weekly status reports
- Single point of contact
- Documented approvals for any changes
Case Study: Transforming a 1970s Kingman Bathroom into a Spa‑Like Retreat
Before the Renovation
The original space was a cramped, tile‑on‑tile nightmare. Dark grout, low‑flow fixtures, and a single‑pane shower door made every morning feel like a chore. Homeowners wanted a fresh start without tearing down the whole house.
The Transformation Process
We began by stripping back the old tile and exposing the original plaster. From there, the plan unfolded in three clear phases:
- Layout redesign: shifted the plumbing wall to create a wider, walk‑in shower.
- Material upgrade: installed slip‑resistant porcelain tiles that hold up against Kingman’s desert heat.
- Smart fixtures: added a thermostatic valve, LED mood lighting, and a Bluetooth‑enabled showerhead.
Every decision was logged in a shared spreadsheet, so the homeowner could see costs in real time. The contractor coordinated the rough‑in plumbing on day one, then sealed the walls before the tile crew arrived.
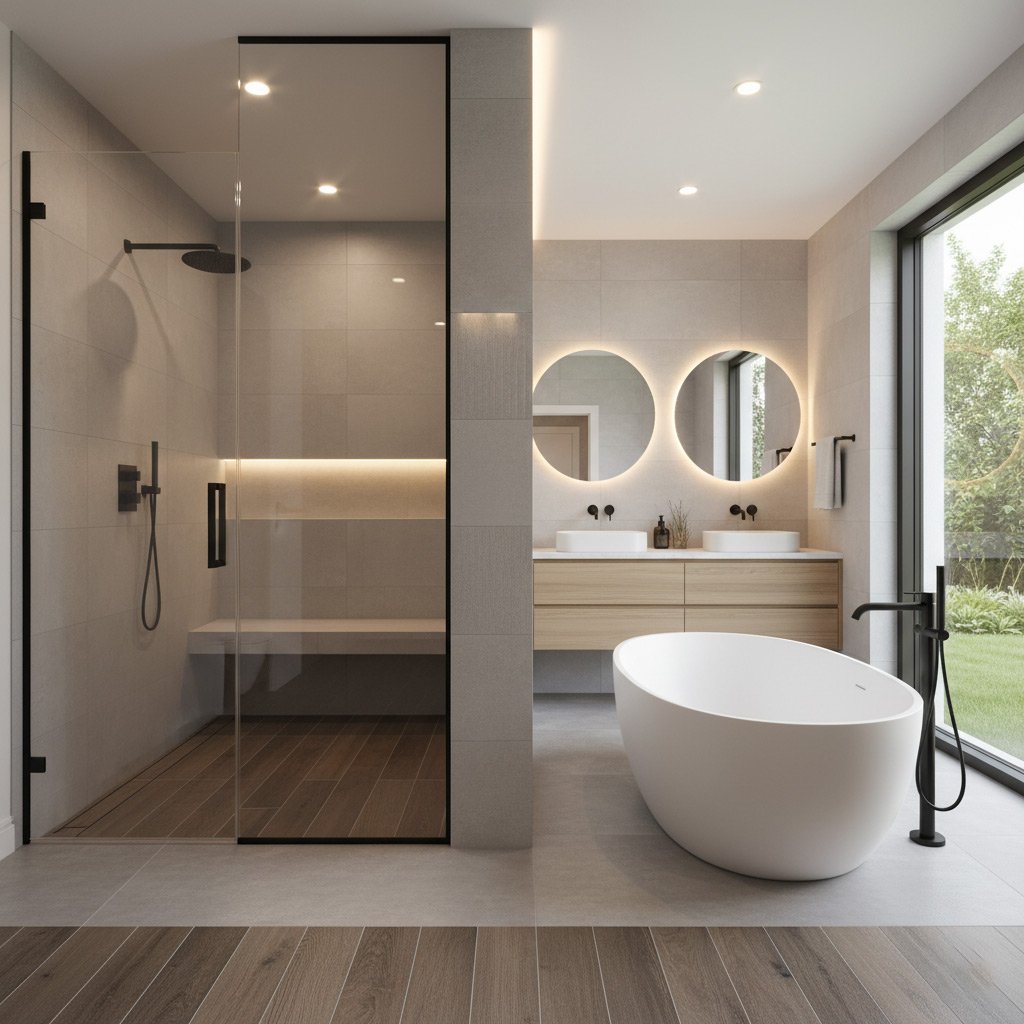
The Result
Today the bathroom feels like a mini‑spa. The new glass enclosure lets natural light flood the space, while the heated floor keeps feet warm on chilly mornings. Homeowners report a 30% increase in home value and a daily ritual they actually look forward to.
Final Words: Your Roadmap to a Stress‑Free New Shower
When the dust settles, the real win is knowing you didn’t have to chase down every decision yourself. Stick to the plan, ask the right questions, and let the timeline breathe. That’s how a new shower stays a joy, not a headache.
What to Keep on Your Radar
- Confirm the final budget before the first tile is laid.
- Double‑check that all permits are signed and filed.
- Schedule a walk‑through with your contractor after rough‑in, before finishes go up.
- Keep a running list of any change orders; a written note beats a vague “maybe later.”
Quick Wins Before the First Tile
Start with a simple, high‑impact move: choose a water‑resistant backer board that matches the local humidity levels. It saves you a costly redo down the line.
Next, set the mood early. A dimmable LED fixture installed now will be easier to wire than trying to retrofit after the walls close.
Finally, bookmark the New Showers page. It’s your cheat sheet for material specs, warranty info, and the next steps when you’re ready to scale up.
People Also Ask
What is the first step in planning a new shower in Kingman?
The first step is to assess the available bathroom space and establish a realistic budget that accounts for materials, labor, and any unexpected costs.How does Kingman's desert climate affect shower material choices?
Because of high temperatures and low humidity, choose moisture‑resistant materials like ceramic tile, quartz, or solid surface that can handle heat expansion without cracking.Do I need to upgrade plumbing when installing a new shower?
Most remodels require updating the water supply lines and drain to meet current codes and ensure proper flow, especially if you’re adding a larger or multiple‑head shower system.What smart shower features are popular for Kingman homes?
Homeowners often opt for digital thermostatic controls, LED mood lighting, and water‑saving flow restrictors that can be managed via smartphone apps.How can I verify a contractor is licensed in Arizona?
Ask for the contractor’s AZ State License Board number, check it online for active status, and confirm they carry liability insurance and workers’ compensation coverage.Kingman Bathroom Remodel brings over a decade of specialized bathroom renovation expertise to homeowners throughout Kingman, Arizona. Their team combines local knowledge with meticulous craftsmanship to deliver functional, stylish spaces that reflect the unique character of the area. Committed to personalized service, they guide each project from design through completion with clear communication and reliable timelines.
Need Bathroom Remodel?
We restore indoor comfort quickly for homes and businesses in Kingman, AZ and nearby ZIPs (86401, 86402, 86403, 86404, 86405). Our technicians diagnose and fix issues efficiently to keep your system running smoothly.
Get Bathroom Quote